Yogurt in the Pressure Cooker
Discover the art of homemade dairy perfection with this easy and foolproof Recipe for Yogurt in the Pressure Cooker. Crafted with just two simple ingredients—whole milk and plain yogurt with live, active cultures—this recipe unlocks the secrets to creamy, probiotic-rich yogurt right in your kitchen. Using the convenient "Yogurt" function on your pressure cooker, you'll achieve professional-quality texture and flavor with minimal effort. The process involves gently heating the milk to the ideal temperature, tempering the yogurt starter, and letting the pressure cooker work its magic over hours of controlled fermentation. Customize your yogurt's tanginess by adjusting the incubation time to suit your taste, and finish it with your favorite toppings like fresh fruit, granola, or honey. Whether enjoyed as a nutrient-packed breakfast, snack, or dessert, this homemade yogurt is fresh, wholesome, and endlessly versatile. Perfect for anyone looking to incorporate healthy, homemade foods into their diet, this pressure cooker technique will save you time while delivering maximum flavor and probiotics.
Smart Nutrition Tracking with SnapCalorie

Recipe Information
Ingredients
- 4 cups Whole milk
- 2 tablespoons Plain yogurt with live, active cultures
Instructions
Step 1: Begin by sterilizing your pressure cooker insert. Rinse it with hot water or place it on the 'Saute' function and allow for a complete dry wipe to ensure a clean surface.
Step 2: Pour 4 cups of whole milk into the pressure cooker insert. Turn on the 'Saute' or 'Boil' function and gently heat the milk to 180°F (82°C) while stirring occasionally to prevent scorching.
Step 3: Once the milk reaches 180°F, turn off the pressure cooker and remove the insert. Allow the milk to cool down to 110°F (43°C). This is the optimal temperature for adding the yogurt starter.
Step 4: In a small bowl, combine 2 tablespoons of plain yogurt with 1/4 cup of the cooled milk. Whisk thoroughly until smooth. This step tempers the yogurt to avoid shocking the cultures.
Step 5: Stir the yogurt mixture back into the pressure cooker filled with cooled milk. Whisk gently to ensure it is evenly mixed.
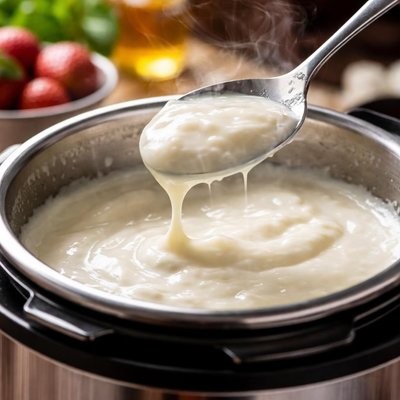
Step 6: Place the insert back into the pressure cooker and close the lid. Select the 'Yogurt' function and set the timer for 8 hours for a mild flavor or up to 12 hours for a tangier yogurt.
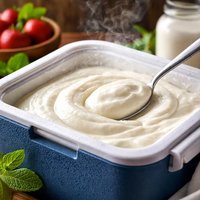
Step 7: After the incubation period, the yogurt should have a thick consistency. Remove the insert, cover it, and chill the yogurt in the refrigerator for at least 3 hours to fully set.
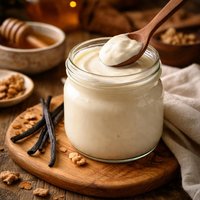
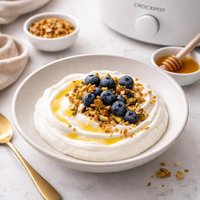
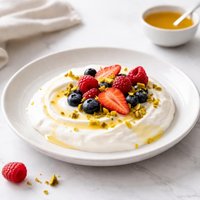
Step 8: Serve the yogurt plain or with your favorite toppings such as honey, fruit, or granola. Store leftovers in an airtight container in the refrigerator for up to 7 days.
Nutrition Facts
Calories |
154 | ||
|---|---|---|---|
% Daily Value* |
|||
| Total Fat | 8.3 g | 11% | |
| Saturated Fat | 5.0 g | 25% | |
| Polyunsaturated Fat | 0.0 g | ||
| Cholesterol | 25 mg | 8% | |
| Sodium | 109 mg | 5% | |
| Total Carbohydrate | 12.3 g | 4% | |
| Dietary Fiber | 0.0 g | 0% | |
| Total Sugars | 12.3 g | ||
| Protein | 8.3 g | 17% | |
| Vitamin D | 3.2 mcg | 16% | |
| Calcium | 286 mg | 22% | |
| Iron | 0.0 mg | 0% | |
| Potassium | 334 mg | 7% | |
*The % Daily Value tells you how much a nutrient in a serving of food contributes to a daily diet. 2,000 calories a day is used for general nutrition advice.
